Ah, progress has been slow of late, though I can’t blame the weather. Well, Not much anyway. With the end of the year, the available daylight at the end of the work day is nonexistent and we have had a very wet winter. No complaints, we need the rain, but since my workspace is not well protected, work stops when it rains or gets dark.
The frame had short supports sticking out to the side to help support the cab and I’ve cut those off and welded them back on at the ends of the frame to allow for easier connection to the body work. I’ll also be able to use the flanges that were for the rear transmission mount for attachment. I’ve been waiting to start the bodywork until I have the frame fully painted.
I finally got a day when the wind was right, not much rain and I had the time to make a bit of a mess. I bought most of a gallon of POR-15 rust protective coating at a discount. The local paint shop had a damaged can they transferred to a new empty and marked it down quite a bit as it had been exposed to air and wasn’t quite full. POR is unusual paint, or coating as they prefer to call it, in that it hardens when exposed to moisture, in addition to flashing off it’s solvents. I painted the outside of the frame with a brush and black POR-15 and it leveled out to look quite smooth and professional. The gallon I bought wasn’t black, but instead was grey so its easy to see where the paint dripped out from the inside. Not the prettiest, but it won’t be very visible. I will have to touch up the front. POR isn’t UV protective, so it should be overcoated anyway. Since I live near the ocean and this frame is already 40 years old, I wanted to protect the inside as much as possible against corrosion.
Eastwood has a new product designed the inside of frames, but it’s a bit spendy at $20 for a can and I’m not sure I’d be able to get it shipped here because of shipping rules with aerosol cans. And I’d have to drill more holes in the frame which I’m not keen on.
It’s called POR-15 Rust Preventive Coating. http://www.eastwood.com/internal-frame-coating-w-spray-nozzle-qt.html
Now that I have the messy bit done and the coatings have cured, I’ll be moving the frame to the covered protection of the back lanai, or porch for those not from the islands. I hope to get the basic frame of the bodywork done fairly quickly. I’ll be able to get the position of the engine and seats figured out and thus the spacing for the rear suspension and drive shaft placement. It’s all been theoretical until now.
I did find that the frame is just at my limit for single handedly moving it about. My lower back complained the next day about the stress placed on it hoisting and turning the frame. It’s easy enough to move with a dolly at the moment, but when I add the bodywork, it will have to be moved on small trucks. I have to do some careful measuring, I’ve been counting of being able to turn the build on its side to get out the door and back around to the garage when the frame building is done, but it will be very close.
Perhaps I’ll just have to get everything set, begin the body build and only weld in the lower half. Then I can more easily move the build to the garage and complete it there. There’s another project currently in that space, so it will have to be completed and the vending machines moved out to their retail locations before that happens.
-
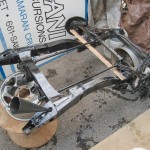
- Frame ready for paint pour
-
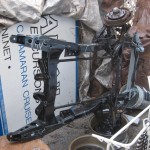
- Pouring done, a bit messy
-
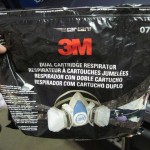
- A must have when using auto paints
-
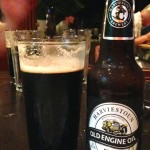
- What to do with old engine oil? If it’s from Harviestoun, you drink it. Mmmm.